


As the winter season gets started, the stoke is definitely high. Snow enthusiasts everywhere have a hopeful glimmer in their eye. Excitement of the adventures that lay ahead are almost uncontrollable. Speaking of adventures, one that continues to grow in popularity is splitboarding. From new films to stories written in the latest ski or snowboard magazine, the draw to the backcountry is strong. If you’re considering trying out the sport, we’ll delve deep into everything you’ll need for backcountry snowboarding gear.
Where To Start?
You’ve decided this is the season to give it a try. The only question is where to start? The answer is knowledge and conditioning. We’ve covered these two points in our article The Lure Of Powder & Reality On How To Start Backcountry Skiing so the only thing we’ll say on these topics is stay safe and make smart decisions. This will ensure you get to ski/ride another day. But inquiring minds will want to know what else is necessary. Well, backcountry snowboarding gear and lots of it! If you’re still complaining about the cost of your alpine gear, maybe backcountry shouldn’t be your new thing. Depending on your bank roll, you could spend anywhere from $3,000 (probably closer to $5,000) just to get going. Once that sticker shock wears off, we will continue…
Now that you’ve caught your breath, let me tell you it’s worth every penny. Think about it. Out in the wilderness with no means of communication, equipment failure can have serious consequences. You can’t just head down to the lodge and have the pro shop fix you up. Backcountry snowboarding gear needs to be bomb proof, comfortable, and efficient.
Gear – Don’t Leave Home Without It!
Beacon, Shovel, Probe, First Aid…
Many think to get started splitboarding you need to head out and grab the latest board with the best reviews like the Weston – Backwoods or the Jones – Frontier. Wrong. The first recommendation for backcountry snowboarding gear goes along with the logic of “Safety First.” Out in the backcountry, there’s no ski patrol making sure conditions are safe or to help you out if you get injured. You and your group are the only fail safe to a great day or a tragic one.
Beacon
![]()
For those unfamiliar with this device, essentially this is a location device each person must have before taking their first trip out of bounds. This is truly one of those investments that could save your life. An avalanche transceiver or beacon sends out a signal that can be received by other transceivers. There is a send mode and a search mode. When touring and riding, it should be in send mode. In the event of a burial, switch to search mode and follow the directions to find your partner. Each one displays a direction and distance. These are tricky to get used to so make sure you practice plenty before your journey.
There are two types of beacons available, single and multiple antennas. Both work, but I only recommend multiple antenna beacons. These will cost more, but they give you direction and distance to the buried party. Singles only display distance, which is very challenging unless you are a snow industry professional. Personally, we use the Tracker3. There are ones with more features and all the bells & whistles, but when you’re in a life or death situation, you want something simple to use.
Shovel

This seems simple and it is, but there are also options. We aren’t going to spend a lot of time on this, but it’s definitely an important safety tool. In the average avalanche burial, you have to move over a ton of snow. Believe me when I say you want a good strong shovel for the job. Never go with plastic. By the laws of physics, plastic becomes more brittle in cold weather, and you don’t want this to break. Next, a telescopic extension gives you more length in turn allowing more leverage and comfort. This will be important once you start to gas out after intense shoveling. Lastly, buy a shovel with a hoe conversion feature. When the shovel is converted, you can rake away snow, which is easier and more sustainable for long periods of time.
Probe

Finally, the probe. Once you locate the victim, you will need to determine how far down to dig. A probe is a collapsible pole that you push down through the snow to pinpoint the location of the buried party. You should always make sure it’s metal, durable, and long enough for the locations’s snowpack you plan to ride.
On To The Fun Stuff!
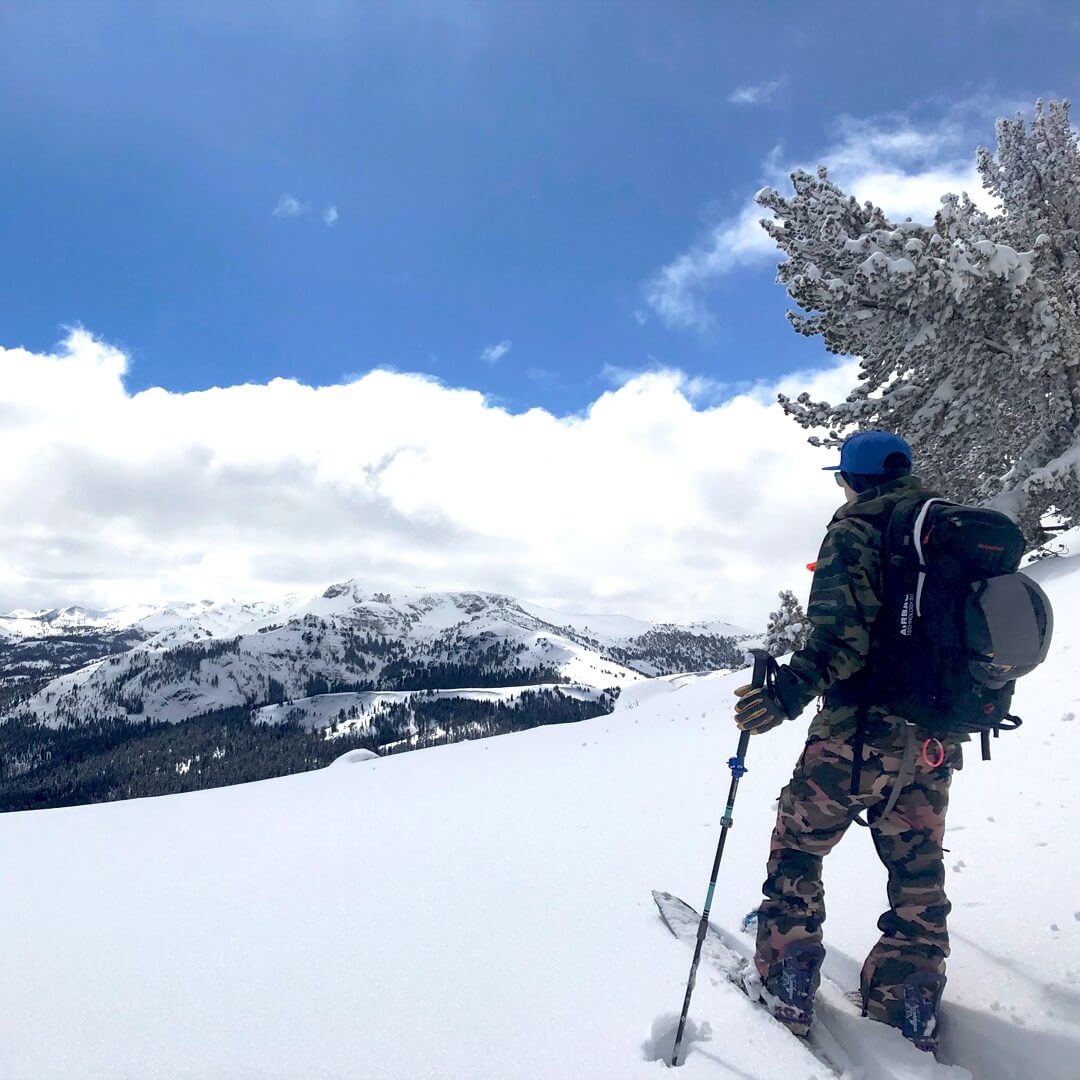
Snowshoes
No matter how good you are at walking, once the snow covers the mountains you’ll have to stay on the top of that fluffy goodness to climb to the top of a peak. There are two options to do this. Either purchase a pair of snowshoes or get a splitboard. We’d recommend the latter and go with a splitboard. Snowshoes are A LOT of work. You’ll expend all that energy slogging up to the top instead of enjoying the ride down. A true snowboard might ride better, but you’ll appreciate how much less work it is when on a splitboard.
Splitboards
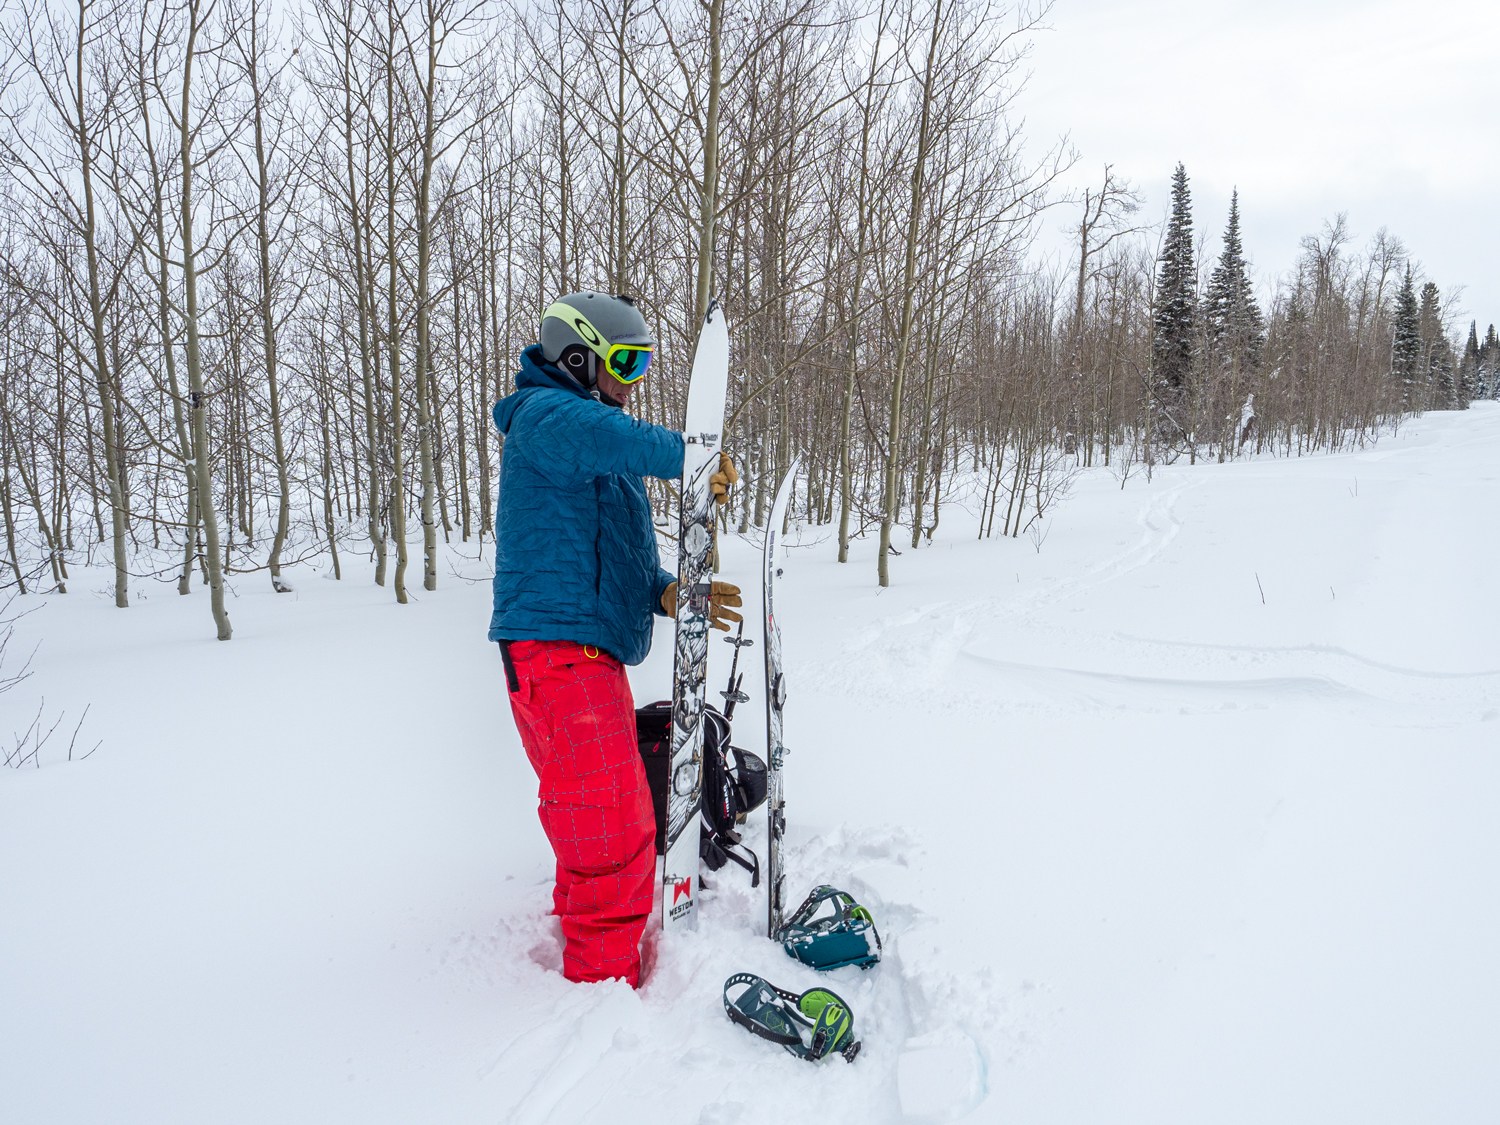
Just like it sounds, this is a snowboard cut in half vertically that turns into skis. Once it’s split, attach skins, and you’ll be able to climb uphill to the goods! As with all snowboards these days, there are many shapes and sizes to fit all needs. Be selective and demo as many options as you can. Alex has fallen head over heels for the Weston Backwoods and you can read about his review here: Choppin Pow, Slashin Corn – The Weston Backwoods Review. Once to the top, reassemble the board, and you’re ready for the downhill. Splitboards come with many different attachment mechanisms that join the board, so be sure to try all the options to see which one you like best. Personally, I am a fan of the Karakoram system but that’s just me. Jaime and Alex love the Spark R&D bindings.
Another thing to note is to practice your conversion before you’re out on the hill. The reason for this is two fold. First off, conditions at the top may be harsh and cold. Once you begin to lose dexterity, it can be difficult to get everything together as it should. The more routine this becomes, the better. Next, think of your skier buddies. Yep, that’s right… nothing annoys a backcountry skier more than waiting on a splitboarders’ conversion. Be sure to be quick and try to keep up so they don’t want to leave you behind!
Skins
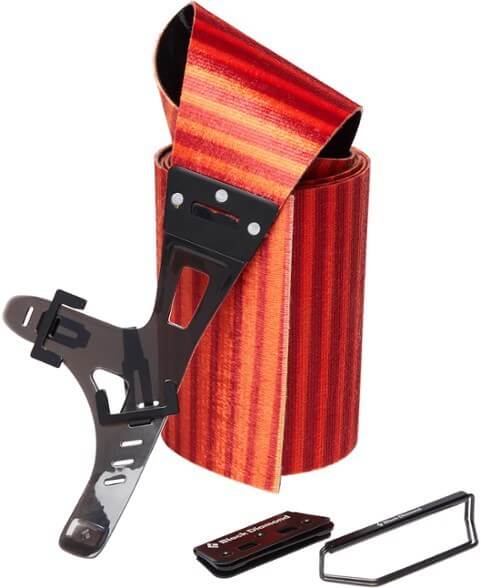
Climbing skins are your primary ascent tool in the backcountry. This tool is a piece of fabric with directional fibers (or hairs) that adheres to your board when it’s split, providing the traction necessary for the ascent. Getting quality skins that fit your splitboard properly is essential to success in touring. Some boards have specific matching skins so grab the ones that fit your setup. If your skin hardware doesn’t fit, your glue doesn’t stick, or your skins aren’t trimmed properly for your board, you could be in for a frustrating day.
For beginners, the focus should be on picking ones that provide maximum grip like the G3 Splitboard+ Grip Climbing skins. Once you get your skinning technique dialed then you’ll want skins that are a combination of good grip but at the same time allow glide on flat sections. We transitioned to the Black Diamond Ascensions and LOVE them. With that being said, all our backcountry mentors use the Pomoca skins due to them being lighter, more packable, decent grip, and great glide. Want the full scoop on the best splitboard skins out there? From top brands to finding the perfect pair for your next mission, check out our guide: Slap Me Some Skin – Best Skins for Splitboard.
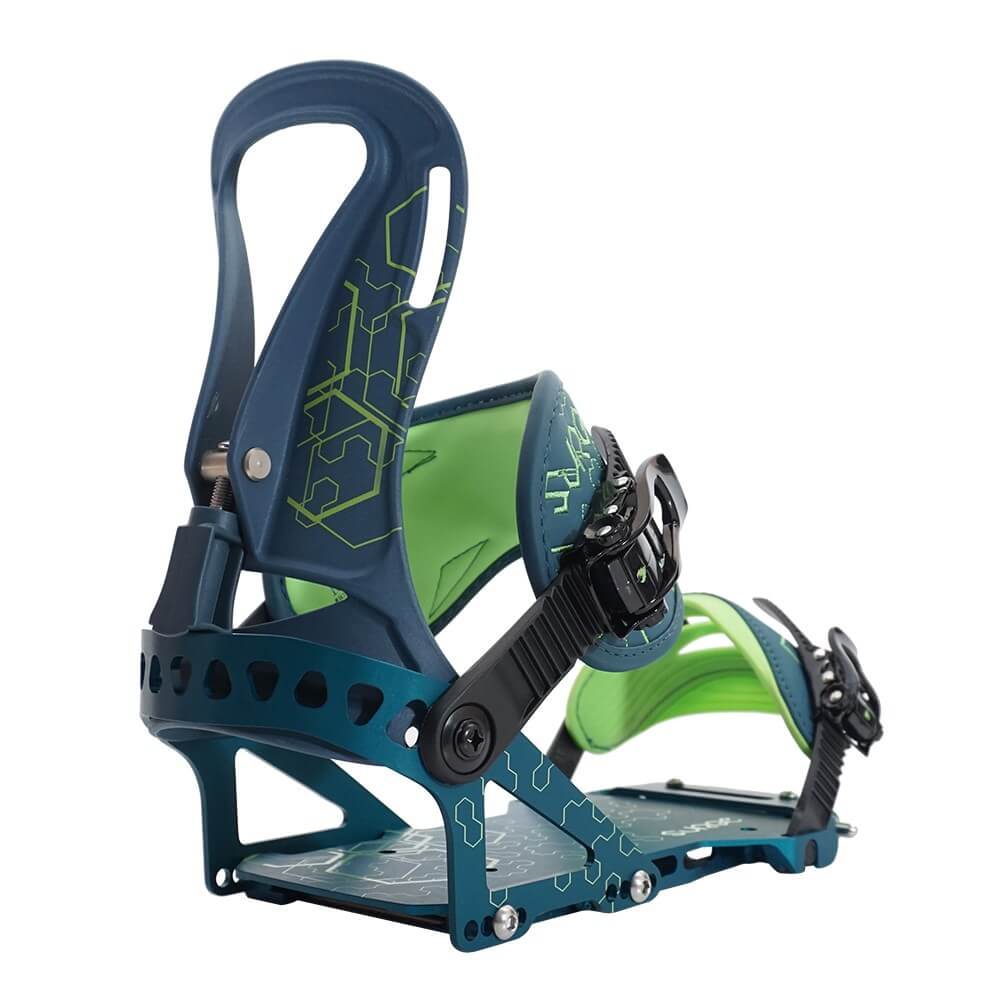
Bindings

Splitboard bindings are really an ingenious design that have been a game changer for snowboarders everywhere. Thanks to this invention, snowboarders no longer have to sled or snowshoe into the backcountry. These attach to the board in your traditional stance just like any other snowboard. What makes them unique is a quick detach feature letting you convert your splitboard into skis. Then reattach and the heel free design makes for an easier ascent up the mountain. These come in hard and soft boot options so know which you prefer and purchase accordingly.
Boots – The Stiffer The Better
The good thing here is any snowboarding boot will work unless you go with a hard boot binding. If you are looking to use your old pair, that’s fine. Just be forewarned that a stiffer boot is better. If using your old boots and they feel squishy, it’s time for a new pair. With most gear options, these are offered in a number of different models even split specific. The best recommendation I have for you in the boot department is to make sure they’re comfortable.
Poles – Size Matters

Believe it or not, more than half of your backcountry splitboarding time will involve using ski poles. When you’re in the market for poles, consider a few factors. How skilled are you at skinning up a mountain? Do you prefer a larger or smaller grip? Understanding these aspects will help you better weigh the tradeoff of cutting weight.
For splitboarders, collapsible poles are essential for easy storage in your pack when you’re shredding the gnar on the way down. And remember, “size matters.” If you’re new to this area, have your local shop fit you for ski poles. The right size can make a significant difference during touring. To delve deeper into what to look for in splitboard poles and discover some of the best options on the market, check out our article: “Don’t Make It Splitsville – How To Find The Best Splitboard Poles.”
Clothing – Stitching Is Key
Yep, you’ll even need to get some new threads. While in the backcountry, you’ll encounter many different types of terrain. Each different feature will be a new challenge calling for different levels of breathability and durability in your clothing. While climbing, you will likely be pretty warm, and it’s best to keep sweating to a minimum. Dress in wicking layers to keep sweat moving away from your body, and of course if you’re hot, take a layer off and vice versa. Look for outer wear that has vents so you can control air flow to provide the most comfortable protection possible.
Your backcountry snowboarding gear will take more of a beating in one day than your resort gear takes all year. Be sure to grab quality gear that’s double layered in key areas. Pay attention to stitching as well before you purchase. This is the only thing protecting you from the elements, and you don’t want it coming apart when it counts the most. To explore the various types of backcountry ski jackets, their specific uses, and discover some of the top options on the market, be sure to read our article: “Backcountry Ski Jackets Are Like Fries, You Can’t Have Just One.”
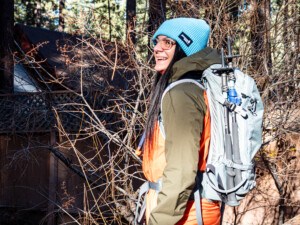
Backpack

From a purely avalanche safety perspective, many people believe that an avalanche (air)bag is the next important piece of equipment to invest in. Along with the normal storage space, it will contain a balloon (or airbag) that inflates at the pull of a cord. Even if you don’t get an avalanche airbag backpack, get a backcountry specific pack that has special compartments designed to hold your shovel, probe, a place to put a water reservoir, and keep all your other backcountry snowboarding gear organized. If you’re curious on what are the avalanche bag brands and how do they stack up, be sure to read out our in-depth article about them:
Go For It!
Now you have the basic knowledge of the backcountry snowboarding gear necessary for splitboarding. This is one step closer to having more fun than you’ve had in all your prior years of riding combined! But before you go straight out, there’s one more important tool in your backcountry backpack — avalanche education. We can’t stress this enough. Understanding how to avoid avalanches instead of just getting good at using all these tools is crucial.
It’s even a good idea to hire a guide on your first couple outings. The backcountry community is tight knit, but not unwelcoming. Enthusiasts are very eager to share their knowledge and may even be willing to give you some tips or suggestions to help you get started. Just don’t expect them to share their secret spots right out of the gate! All in all, this is one of our favorite ways to explore and enjoy the mountains, and I highly recommend it. The key is be smart and safe out there, and I think you’ll also find the reward you are seeking. If you want to learn more about avalanche education, read reviews on gear, and peruse our personal adventures like climbing Mt. Shasta, head over to our homepage for all things backcountry.

Well written. Taking classes from a volunteer organization like Friends of Berthoud Pass or Friends of the San Juans in Colorado is also helpful.
I love how this article points out that a Beacon Shovel and Probe are not the only tools you need to venture out. In the worst case scenario understanding what to do next is as important as route finding and weather tracking.